Anda ingin membuat animasi flash Label/ Tag Cloud pada blog kesayangan kita ? Tentu bukan ?
Dengan tampilan Animasi Flash pada Label/ Tag Cloud pada blogger kita tentu akan menambah kesan tersendiri.
Coba perhatikan Animasi Label di bagian sidebar... menarik bukan??
Sebenarnya tutorial ini saya dapatkan di sini (Blogger Buster - Amanda ), namun saya mencoba menerjemahkan ke bahasa kita agar nantinya para blogger Indonesia dapat membuatnya dengan mudah. Mari kita coba bersama-sama cara menginstalnya.
1. Kita langsung menuju ke Layout > Edit HTML pada Dasboard Blogger.
2. Cari kode dibawah ini :
<b:section class='sidebar' id='sidebar' preferred='yes'>
3. Kemudian copy dan paste kode dibawah ini persis dibawah kode di atas :
<b:widget id='Label99' locked='false' title='Labels' type='Label'>
<b:includable id='main'>
<b:if cond='data:title'>
<h2><data:title/></h2>
</b:if>
<div class='widget-content'>
<script src='http://halotemplates.s3.amazonaws.com/wp-cumulus-example/swfobject.js' type='text/javascript'/>
<div id='flashcontent'>Blogumulus by <a href='http://www.roytanck.com/'>Roy Tanck</a> and <a href='http://www.bloggerbuster.com'>Amanda Fazani</a></div>
<script type='text/javascript'>
var so = new SWFObject("http://halotemplates.s3.amazonaws.com/wp-cumulus-example/tagcloud.swf", "tagcloud", "240", "300", "7", "#ffffff");
// uncomment next line to enable transparency
//so.addParam("wmode", "transparent");
so.addVariable("tcolor", "0x333333");
so.addVariable("mode", "tags");
so.addVariable("distr", "true");
so.addVariable("tspeed", "100");
so.addVariable("tagcloud", "<tags><b:loop values='data:labels' var='label'><a expr:href='data:label.url' style='12'><data:label.name/></a></b:loop></tags>");
so.addParam("allowScriptAccess", "always");
so.write("flashcontent");
</script>
<b:include name='quickedit'/>
</div>
</b:includable>
</b:widget>
4. Anda bisa memodifikasi pada :
* Width is set to 240px
* Height is set to 300px;
* Background color is white
* Test color is grey
* Font size is "12"
Perhatikan kode berikut ini :
var so = new SWFObject("http://halotemplates.s3.amazonaws.com/wp-cumulus-example/tagcloud.swf", "tagcloud", "240", "300", "7", "#ffffff");
Kode di atas adalah tempat untuk merubah nilai Width (merah), Height (biru) dan background (ungu)
Kemudian untuk merubah ukuran text coba perhatikan kode dibawah ini :
so.addVariable("tagcloud", "<tags><b:loop values='data:labels' var='label'><a expr:href='data:label.url' style='12'><data:label.name/></a></b:loop></tags>");
Anda bisa merubah ukuran di bawah 12 atau lebih
Nah selamat mencoba
30 Agustus 2008
29 Agustus 2008
Membuat Tab Horizontal dengan CSS
Tanpa sengaja saat saya blogging, berselancar di dunia maya saya temukan Aplikasi CSS Tab Designer Versi 2.
Mumpung si Net lagi ngebirit larinya maka IDM segera meluncur untuk membongkar persembunyian CSS Tab Designer V.2 tersebut di RS.
Kemudian seharian aku pelajari dan hasilnya, akan saya coba untuk dipaparkan disini.
Kode HTML yang dibawah ini dipasang di elemen halaman bagian "<>" ( tahu khan maksudnya )
<div id="navcontainer">
<ul id="navlist">
<li id="active"><a href="#" id="current">HOME</a></li>
<li><a href="#">OPO MANING</a></li>
<li><a href="#">OPO MANING</a></li>
<li><a href="#">MANING OPO</a></li>
<li><a href="#">NING OPO MA</a></li>
</ul>
</div>
Nah sekarang untuk kode CSS saya pasang semabrangan, yang jelas di bagian <head>. Atau karena posisi di bawah Header ( Judul blog kita ) maka saya pasang di bawah kode ini :
#header img {
margin-$startSide: auto;
margin-$endSide: auto;
}
Dibawah ini kode yang harus dipasang :
#navcontainer
{
font-family: Arial,Sans-Serif;
margin: 0 auto;
width: 70%;
border-bottom: 1px solid #ddd;
}
#navlist
{
width: 60%;
text-align: center;
margin: 0 auto;
padding: 0;
text-indent: 0;
list-style-type: none;
}
#navlist li
{
padding: 0;
margin: 0;
text-indent: 0;
display: inline;
}
#navlist li a
{
letter-spacing: -1px;
text-decoration: none;
color: #ccc;
font-size: 1em;
padding: 0 2px;
border-top: .5em solid #eee;
}
#navlist li a:hover,#navlist a#current
{
color: #333;
border-top: none;
font-size: 1.5em;
}
#navlist a#current { color: #fc6; }
Nah bagi rekan-rekan yang ingin punya CSS Tab Designer Versi 2. silahkan :
Download : DISINI ( FIle ........RAR )
Contoh hasilnya : DISINI
Semoga bermanfaat dan dapat dijadikan tambahan bahan belajar.... ntar jangan lupa sama si bC, kalau udah pinter.... bC diajari.... biar bC tambah pinter
28 Agustus 2008
Firefox Add-on: Pray Times! 1.1.3
Menjelang bulan Ramadhan, tentu sebagai umat Islam kita mempersiapkan diri baik mental maupun phisik kita. Bulan yang penuh berkah dan hikmah ini merupakan bulan yang didambakan.
Lalu apa hubungannya bulan Ramadhan dengan Firefox Add-on ;Pray Times!1.1.3?
Di saat puasa nanti, sambil menghabiskan waktu di siang hari dan menunggu beduk magrib.... so kita main chatting, blogging etc bin lainnya. Nah, biasanya kalau sudah asyik chatting apalagi perutnya lagi ngerock... tentu lupa akan sholat Dzuhur..he...he... Untuk itu dalam browser kita ( FIrefox ) perlu dipasang Add On Pray Time 1.1.3 yang bisa anda download .
Sehingga saat anda asyik Chatting.... PC anda akan mengingatkan bahwa waktu Dzuhur sudah tiba, demikian dengan Sholat lima waktu lainnya.
Berikut Fiturnya :
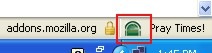
Gambar di atas terletak pada sudut pojok kanan monitor kita, tentunya setelah kita menginstall Add on tersebut dan menjalankan browser Firefox. Untuk setting fiturnya silahkan klik ICON yang berada di kotak merah pada gambar di atas.
Maka akan muncul tampilan sebagai berikut :

Klik "Edit Location", sehingga muncul jendela Set Location. Masukkan kota atau kode pos di mana kita tinggal saat ini, kemudian klik Find maka Pray Time kan mendeteksi secara otomatis.
Berikut ini beberapa fitur dari Pray TIme :
* Various methods of time calculation
* Countdown to each prayer time
* Automatic playing of Adhan sound
* Supporting all locations around the world
* Local calculation of prayer times (no connection to Internet is needed)
Yup... selamat mencoba... dan selamat menjalankan Ibadah Puasa di Bulan Ramadhan, semoga kita menjadi manusia yang selalu membawa berkah pada lingkungan di manapun kita berada....amien.
(Hasil posting kedua menggunakan Windows Life Writer)Winrar 4.1.65
WinRAR introduces an original compression algorithm. It allows higher compression ratios than other PC archiving tools, especially
for executable files, object libraries, large text files, etc.
* WinRAR offers an optional compression algorithm highly optimized for multimedia data.
* WinRAR supports files and archives up to 9,223,372,036,854,775,807 bytes in size, about 9000PB. The number of archived files is unlimited for all practical purposes.
* WinRAR provides complete support for RAR and ZIP 2.0 archives and is able to unpack CAB, ARJ, LZH, TAR, GZ, ACE, UUE, BZ2, JAR, ISO, Z, 7Z archives.
* WinRAR supports NTFS file security and data streams.
* WinRAR offers both a classic interactive Windows interface and the command line interface.
* WinRAR provides functionality for creating a 'solid' archive, which can raise the compression ratio by 10% - 50% over more common methods, particularly when packing large numbers of small files.
* WinRAR offers the ability to create and change SFX archives using default and external SFX modules.
* WinRAR offers the ability to create a multi-volume archive as SFX.
* WinRAR offers a number of service functions, such as setting a password, adding archive and file comments. Even physically damaged archives may be repaired and an archive may be locked to prevent further changes. Authenticity information may be added for additional security and WinRAR will store information on the last update and name of the archive.
26 Agustus 2008
Blowfish is the new line of shoes
 At first our two months more will be pointed in the Idul Fitri Holiday, whichever we needed shoes or sandals that were good to be worn while we went on a trip outside the city or visited to the family at the native village.
Sometimes we must often arrange time to look for several qualities of shoes. Yeah, it’s not easy as it seems. Besides the design, choosing the right shoes is really important for our health in our ankles and feet. So I tried to look for information in the internet about the place that provided the collection of many relaxed shoes that were biggest, funky shoes, sandals or flat boots.
I found blowfishshoe.com. In this site I could find information that was needed by me about shoes with most pity chatted and the good pattern by planning noise in America, Europe and Australia such as David Aaron, Rocket Dog, Hippopotamus and etc.
Various styles of the feature, the form and his quality were clearly quality that was offered by Blowfish Shoes. This was the form of the shoes product and extraordinary sandals. We could also get information about the retailer from this product that close to our location. Blowfish Malibu co-operated with the famous retailer like, Victoria’s Secret, David Z, Delia’s, DSW, the Famous Footwear, JILDOR, as the Bill TonMacy’s, the Free Person, Dillard’s, the Seller of urban clothes and many more. Looked around in details there, and we will erect was contained with various Blowfish Men’s Shoes picture models and Blowfish Women’s Shoes.
Shopping now becomes more effective, because they offered the customer's opportunity to contact Blowfish Malibu through the email. Than wasted time and the power more, I thought about asking friends immediately the shoes expenses went through Blowfish malibu. Therefore I more enjoy eventually in filling up the Idul Fitri holiday with the family.
Windows Live Writer
Setelah berkunjung di blog ini dan blog ini, saya tertarik untuk mencoba posting lewat Windows Live Writer, yang menurut sumbernya sangat menjanjikan kemudahan dan dapat menghemat biaya anggaran PLN & Speedy ( Mungkin XXX )
Sebelum anda menjalankan program ini, tentunya anda terlebih dahulu harus menginstall Windows Update Agent dan WLW itu sendiri.
Yang jadi pertanyaan, apakah hal ini berlaku bagi Windows yang bajakan... karena terkait dengan "Update". Yang jelas.... tidak ada salahnya kita coba, toh dari mana kita tahu sesuatu itu akan berhasil kalau kita tidak mencobanya.
Ingat... berhasil untuk sesorang namun belum tentu berhasil untuk kita, demikian sebaliknya.
Mari kita sama-sama mencoba.... semoga sukses.
25 Agustus 2008
Tips untuk WINDOWS
Memiliki perangkat PC atau notebook perlu perawatan agar kinerja dari piranti tersebut memuaskan kita. Perawatan tersebut misalnya adanya jadwal berkala untuk defrag hardisk, pemasangan anti virus sekaligus mengupdatenya dan lainnya.
Namun seiring dengan waktu berjalan, kadang perangkat tersebut terkesan lambat terutama saat loading awal ataupun saat shutdown.
Ada beberapa langkah untuk mengatasi hal tersebut :
1. Jalankan System Restore Point, tujuannya untuk berjaga-jaga apabila terjadi error maka kita bisa mengembalikan konfigurasi system seperti semula.
Cara setting Restore Point :
Klik Start -> Programs/ All Programs -> Accessories -> System Tools -> System Restore.
Dalam layar pembuka terdapat 2 opsi, pilih opsi ke dua (Create a Restore Point) -> Next -> masukkan nama yang mudah diingat, misal “System Default” -> Create.
Apabila terjadi sesuatu (error) setelah anda mengedit registry maka ulangi langkah di atas dan serbagai gantinya pilih “Restore my computer to early time” pada layer Welcome to System Restore untuk mengembalikan status yang baru disimpan.
2. Pada area operating system buka System Configuration Utility. Pada tab BOOT.INI, beri tanda (P) pada “/NOGUIBOOT”. Ini akan mempersingkat waktu boot dengan menghilangkan Windows startup screen. Pada tab Startup, seleksi ulang seminimal mungkin item yang sangat dibutuhkan. Hal yang sama juga dilakukan pada service yang dijalankan. Usahakan jumlah service yang terload tidak lebih dari 25.
3. Untuk mempercepat loading menu, Klik Start -> Run -> ketik regedit, tampilkan registry editor, arahkan key berikut ini dengan meng-klik tanda plus disebelah nama setiap level :
HKEY_CURRENT_USER / Control Panel
Klik “Desktop.” Akan muncul daftar disisi kanan. Klik dua kali “MenuShowDelay” dan ubah Value data menjadi 0. Klik OK.
4. FREE-UP MEMORY
Anda dapat mengubah registry key untuk mencegah windows menyimpan bagian-bagian dari program dalam memory meskipun tidak lagi digunakan ketika men-shutdown sebuah program. Bagian dari program yang disebut dynamic link libraries (DLLs) akan memakan space memory
Tampilkan Registry Editor, arahkan ke key berikut ini :
HKEY_LOCAL_MACHINE / SOFTWARE /Microsoft /Windows /CurrentVersion
Pada CurrentVersion, klik kanan lalu pilih new -> key.
Dalam box yang muncul (“New Key #1”), ubah menjadi AlwaysUnloadDLL tekan Enter. Pada sisi kanan klik dua kali kata Default.
Untuk value data, masukkan 1 lalu klik OK.
Tutup regedit.
5. PERSINGKAT STARTUP
Windows dapat disetting untuk menampilkan informasi seputar aplikasi yang membuatnya startup lebih cepat, caranya dengan mengubah seberapa banyak kerja dari sebuah program yang disebut Prefetcher.
Tampilkan regedit, kemudian cari : HKEY_LOCAL_MACHINE / SYSTEM / CurrentControlSet / Control / Session Manager / Memory Management / PrefetchParameters
Saat PrefetchParameters di-klik, sisi sebelah kanan editor akan menampilkan entry. Klik dua kali “Enable Prefetcher” dan ubah value data menjadi 5 (dalam decimal, bukan hexadecimal). Klik OK. Tutup regedit
6. Jika anda mempunyai banyak folder dan subfolder, setiap kali mengakses satu diantaranya, windows menghabiskan banyak waktu dalam mengupdate “last accessed” folder dan semua subfolder-nya. Dengan menghentikan proses itu akan menghemat waktu.
Buka regedit, masuk pada HKEY_LOCAL_MACHINE / SYSTEM / CurrentControlSet / Control
Pada, Control, klik kanan FileSystem, pilih New, lalu DWORD Value. Ganti “New Value #1” dengan NtfsDisableLastAccessUpdate dan tekan Enter. Klik dua kali NtfsDisableLastAccessUpdate dan ubah Value data menjadi 1. Klik OK. Tutup regedit
7. Jika anda menjalankan lebih dari satu atau dua program bersamaan, ada kemungkinan windows kehabisan RAM. Untuk kasus ini, system mulai menggunakan sebagian dari hard disk, yang dapat disebut “swapfile”, guna menyimpan informasi. Memang jauh lebih lambat dibandingkan RAM, paling tidak dapat menjalankan sebuah program. Terkadang windows menggunakan swapfile sebelum kejadian tersebut. Kita dapat menjalankan tweak msconfig berikut ini.
Klik Start -> Run -> ketik msconfig
Klik tab System.ini
Klik tanda plus disebelah 386enh.
Klik New, lalu ketikkan “ConservativeSwapfileUsage=1” dalam box yang muncul.
Klik OK. Close
Restart Windows anda….
8. Setting ulang interface dapat menambah kecepatan. Masuk ke System Properties, pilih tab Advanced. Setting ulang pada pilihan Performance. Kemudian pilih “Adjust for Best Performance” pada tab Visual Effects.
9. Menghilangkan wallpaper , minimalisasi jumlah desktop icon dapat mempercepat PC Anda.
10. Menghilangkan bunyi pada event Start Windows juga akan mempercepat proses boot. Mau lebih cepat lagi? Pilih “No Sounds” pada sound scheme.
11. Batasi penggunaan type Font, karena makin banyak jumlah font yang terinstal akan menambah berat beban kerja PC Anda. Windows secara default menyertakan sejumlah kurang dari 100 font.
12. Seringnya kita mengupdate program juga mempengaruhi cepat atau lambatnya PC. Cara paling mudah menggunakan utility tambahan seperti Driver Cleaner. Utility ini membersihkan driver nVidia dan ATI terdahulu. Driver Cleaner, juga dapat membersihkan driver lama beberapa chipset motherboard, sound card, dan lain-lain.
13. Memanfaatkan Software Eboostr, juga dapat mempercepat kinerja PC kita.
Semoga sharing ini bisa bermanfaat bagi kita semua.
22 Agustus 2008
Header motif kayu dengan Adobe

Kali ini bC akan mengajak sharing cara membuat header blog kita, dengan menggunakan Adobe Photoshop CS3. Coba Perhatikan gambar di atas:
Langkah-langkahnya adalah sebagai berikut :
1. Buat file baru dengan ukuran canvas sesuai dengan ukuran ( dalam pixel )header dari blog kita. Pada Color Picker berikan warna untuk foreground = #f7ad0e, untuk background = #8c531b. Kemudian klik Filter ---Render --- Clouds . Kembali ke menu Filter --- Noise --- Add Noise. Berikan nilai Amount = 10 %, pada distributin klik button Gaussian , centang Monochromatic lalu klik OK.

2. Kembali ke menu Filter arahkan mouse pada Blur --- Motion Blur. Berikan nilai Angle = 50 dan Distance = 999 pixels, kemudian klik OK.

3. Masuk ke menu Filter arahkan mouse ke Blur lalu ke Gaussion Blur. Isikan Radius = 1 pixels, lalu klik OK.

4. Kembali lagi ke menu Filter arahkan mouse ke Distort lalu ke Twirl lalu isikan nilai Angle = 115 dan klik OK.

5. Dengan “Ctrl + J “ buat duplikat Layer Background dan beri nama layer tersebut, missal DASAR 1. Double klik layer DASAR 1 agar jendela “Layer Style Dialog Box” muncul. Klik pada “ Bevel & Emboss “ dan biarkan setting nilainya sesuai aslinya (Default ). Kemudian buat duplikat layer dari DASAR – 1 dan berikan nama DASAR – 2.
6. Sekarang kita akan membuat tulisan daripada judul blog kita, Aktifkan “ Horizontal Type Tool” dan ketikkan judul yang kita kehendaki. Kemudian atur besar kecilnya judul yang tentunya disesuaikan dengan bidang background. Setelah kita mengatur posisi Text sesuai dengan yang kita kehendaki , pilih layer Text dan layer Dasar 2 dengan menekan Ctrl lalu arahkan mouse pada layer tersebut dan klik layer keduanya. Dengan Ctrl + Shift + I , lalu klik pada posisi di kotak merah yang terlihat di gambar dibawah ini dengan tujuan untuk menyeleksi kedua buah layer tersebut.

7. Tanpa menghilangkan tanda seleksi, klik layer Dasar 2 kemudian tekan Del pada keyboard. Kemudian hilangkan tanda seleksi dengan Ctrl + D, lalu klik Icon Mata pada layer Text. Lihat hasilnya pada gambar di bawah ini.

8. Sekarang aktifkan Layer Dasar 2, kemudian klik 2 kali untuk menampilkan jendela Layer Style. Pada Layer Style klik Drop Shadow dan aktifkan.
Berikan nilai pada Opacity = 80 %, Angle = 120 , Distance = 5 px, Spread = 18 %, Size = 5 px. Coba perhatikan hasilnya pada gambar dibawah ini.

9. Langkah selanjutnya kita aktifkan Layer Dasar 1, dengan mempergunakan Rectangular Marquee Tool (M) buat seleksi pada bidang Layer Dasar – 1 seolah-olah kita akan membuat bingkai tulisan.
Kemudian tekan tombol DEL pada keyboard, dan coba perhatikan hasilnya pada gambar berikut :


10. Masih di layer Dasar – 1, klik dua kali pada layer Dasar – 1 untuk menampilkan jendela Layer Style. Centang kotak Drop Shadow kemudian aktifikan dengan mengklik Drop Shadow. Berikan nilai Opacity = 75 %, Angle = 120 , Distance = 2 px, Spread = 0 % dan Sizez = 15 px.

11. Sekarang kita akan memberikan effek bingkai untuk gambar yang berada di samping title. Masih bekerja di layer Dasar – 1, buat seleksi dengan menggunakan Rectangular Marquee Tool, setelah itu pada menu Layer pilih New lalu pilih Layer Via Copy .

Demikian cara modifikasi Header dengan Adobe Photoshop CS3, semoga bermanfaat
Mengingat Loading daripada blog ini berat, saya membuat versi PDF dari tutorial ini dan dapat anda download di JURAGAN.
21 Agustus 2008
CCleaner 2.10.618
 CCleaner 2.10.618
2.79MB (Freeware)
CCleaner (formerly Crap Cleaner) is a freeware system optimization and privacy tool. It removes unused and temporary files from your system - allowing Windows to run faster, more efficiently and giving you more hard disk space. The best part is that it's fast! (normally taking less than a second to run) and Free.
Cleans the following:
* Internet Explorer Cache, History, Cookies, Index.dat.
* Recycle Bin, Temporary files and Log files.
* Recently opened URLs and files.
* Third-party application temp files and recent file lists (MRUs). Including: Firefox, Opera, Media Player, eMule, Kazaa, Google Toolbar, Netscape, Office XP, Nero, Adobe Acrobat, WinRAR, WinAce, WinZip and more...
* Advanced Registry scanner and cleaner to remove unused and old entries. Including File Extensions, ActiveX Controls, ClassIDs, ProgIDs, Uninstallers, Shared DLLs, Fonts, Help Files, Application Paths, Icons, Invalid Shortcuts and more... Backup for registry clean.
* Windows Startup tool.
Monggo kulo aturi nyedut dateng mriki, gratis ndak bayar...ndak pakai ziddu..he..he..he
20 Agustus 2008
Dollar meneh....????
Berita gembira untuk hari ini dari Blogsvertise buat bC adalah :
1. Tanpa harus melekkan untuk ngintip GBT, pagi ini dia nongol dengan beberapa tawaran yang cukup lumayan buat latihan ngerpek, nyontek, ngedit, buka kamus dan pada akhirnya klik "Accept" untuk buat laporan kalau kerjaan udah siap dikoreksi, dibatalkan atau .... dollar masuk Paypal.
2. Nampaknya blog Blogsvertise mulai meringankan CARAKA -nya dalam mereview tugas yang diberikan, hal ini dapat kita lihat pada Advertiser Notes: yang mencantumkan Anchor text & URLnya sekaligus, sehingga pikiran kita fokus pada tugas yang diberikan, tanpa harus meraba-raba dimana link harus dipasang.
3. Email masuk mengabarkan kepada bC, bahwa $10 sudah "nylempit" di dompet Paypal yang sampai dengan saat ini status accountku masih dibawa "Casper".
Nampaknya GBT akan diberikan apabila kita sudah ngeposting sebanyak 3 postingan dari posting tugas yang diberikan. Ya..itu sih berdasarkan pantauan bC, atau barangkali menurut anda gimana ?
Sharing cari dollar....yuk!
About Camelback Displays
 Yesterday afternoon, Haris asked about the requirement in order to prepare the trade exhibition that will be held next week by the company where he worked
Haris was the new worker in the company, and he like that was not yet experienced in the matter of the exhibition decoration of the trade. At this time he was given by responsibility of being in charge of the problem of this exhibition.
"Haris, why asked about that was I did not understand about this exhibition? Okay, I will help you to search in the internet about this requirement " answer me. I remembered with Herman that was experienced about exhibition details, immediately I contacted him.
Herman explained " If you are looking for trade show displays, trade show exhibits and trade show booths, camelbackdisplay.com is right place for you. You can find anything to support your event, the completed store who offer anything. Camelbackdisplays.com is the online store for all these products which are used in the trade show displays. This Website provides you a variety of trade show displays along with a high quality service to the customers for trade show exhibits, table covers for your promotional stalls, table top display. and more. You can order online, or by phone with their toll free phone number which makes getting your displays quick and without being difficult tired."
From Herman's information, I immediately contacted Haris to see this site in the internet.
19 Agustus 2008

17 Agustus 2008
Bannershop GIF Animator 5.11

Create, edit, and optimize animated GIFs images for the Web. Animate images, shapes, and texts, using predefined animation effects such as Fade, Zoom, and Blur, or build animations from existing images. Bannershop GIF Animator uses a powerful optimization engine that can significantly reduce GIF file size.
The Optimization Wizard leads the user through the process, providing instant preview of optimized animation, so users can balance between image quality and the file size.
The application can create single or multi-frame animations. Master frame can be used as a background for entire animations, so repetitive graphics can be easily reproduced and managed. Extendable architecture allows adding new animation extensions.
MERDEKA

Dirgahayu BANGSAKU.....
Dirgahayu NEGERIKU......
Mari kita bangkit dari mimpi.....
Banyak tetesan darah mengalir dalam membangun negeri ini
Bangkit....bangkit bangsaku
Bangkit....bangkit generasi bangsaku
Jangan sia-siakan pengorbanan pendahulumu.....
Bangkit.....
Mari kita isi kemerdekaan ini...
Tingkatkan kepedulianmu untuk membangun negeri ini
MERDEKA.....MERDEKA.....MERDEKA
15 Agustus 2008
Portable Adobe Fireworks CS3

Accelerate web design and development with Adobe Fireworks CS3 software, the ideal tool for creating and optimizing images for the web and rapidly prototyping websites and web applications. Fireworks CS3 offers the flexibility to edit both vector and bitmap images, a common library of prebuilt assets, and time saving integration with Adobe Photoshop CS3, Adobe Illustrator CS3, Adobe Dreamweaver CS3, and Adobe Flash CS3 Professional software.
Top features:
Vector and bitmap editing
Create and edit vector and bitmap images, and import and edit native Adobe® Photoshop® and Adobe Illustrator® files.
Image optimization
Optimize graphics for virtually any delivery scenario with preview, cross-platform gamma preview, selective JPEG compression, and a wide range of export controls.
Efficient Photoshop and Illustrator integration
Import Photoshop (PSD) files while retaining hierarchical layers, layer effects, and blend modes. Save Adobe Fireworks® (PNG) files back into Photoshop (PSD) format. Import Illustrator (AI) files while retaining graphic integrity, including layer, group, and color information.
Rapid prototyping
Prototype interactive layouts for websites and rich Internet applications. Export website prototypes to Adobe Dreamweaver® and RIA prototypes to Adobe Flex™.
Multipage support
Use the new Pages panel to create multiple pages in a single document (PNG file), and share layers across multiple pages. Each page can contain its own slices, layers, frames, animations, and canvas settings, making it easy to simulate website flow in a prototype.
Hierarchical layer organization
Organize and manage your prototypes with a new hierarchical layer structure — similar to the one in Adobe Photoshop — that enables you to easily organize web layers and pages.
Filter effects
Apply lighting effects, shadow effects, styles, and blend modes, including seven new blend modes from Photoshop, to add depth and character to text and symbols.
Jump-start your prototyping with a common library of graphic symbols, text symbols, and animations frequently used in web applications, forms, interfaces, and websites.
Intelligently scale buttons and graphic symbols (in vector or bitmap) with 9-slice scaling. Combine 9-slice scaling with the new Auto Shape library to accelerate website and application prototyping.
Streamlined Dreamweaver and Flash integration
Copy any object in Fireworks CS3 and paste it directly into Dreamweaver CS3. Create pop-up menus that can be saved as CSS and HTML. Export Fireworks (PNG) files directly to Flash CS3 Professional while maintaining vectors, bitmaps, animations, and multistates, and then edit in Flash CS3.
Download : Wonten mriki poro dulur...
Publikasi artikel lewat Office 2007.
Office 2007 merupakan alternatif untuk menulis artikel yang kemudian kita publikasikan ke dalam blog kita dalam hal ini “Blogger”. Berdasarkan pengalaman saya, ada kelebihan yang patut dicoba namun ada kekurangan yang mestinya dicari solusinya.
Disini saya akan mencoba membahas kelebihan dan kekurangan tersebut yang menurut saya bisa dijadikan pertimbangan bila anda ingin mencobanya.
Kelebihannya :
1. Kita tidak perlu membuka situs blogger, karena otomatis langsung sign in ke blogger.
2. Memudahkan kita untuk menyusun paragraf dari artikel kita.
3. Karakter simbol yang kita pasang, sesuai dengan hasil edit kita.
4. Pembuatan kolom atau tabel mudah, karena kita tidak perlu mengedit kode html di blogger.
Kekurangannya :
1. Harga software office 2007 mahal untuk ukuran kita.
2. Untuk menambahkan gambar susah, bahkan sering gagal.
3. Dibutuhkan ketelitian apabila kita ingin mengoreksi kode html artikel tersebut. Terutama apabila kita ingin menambahkan kode readmore, sehingga terkesan sulit bagi orang yang awam terhadap kode html.
4. Terkadang hasil tulisan lebih kecil pada tampilan artikel kita di blogger.
Bagaimana menurut anda, apakah ada solusi untuk memaksimalkan kelebihan dan meminimalisasi kekurangan tersebut?
13 Agustus 2008
About Credit Cards

At this time the existence of the credit card really was needed, especially the perpetrators of the business. As being known by us that the function of the credit card a large number of very much, the business in the internet then did not escape from the function of the credit card. Especially if this business used the Paypal service, that verified his membership used the credit card also.
In this growing business world and competition you will definitely need credit card to support your business activities. Especially in this internet era, where you can buy and sell almost anything online trough internet. You will face a hard time when you want to pay the products/services you need if you don’t have credit card.
There are various types of credit cards available now however sometimes people don’t really understand the concept behind those cards type. Or maybe they are confused which credit card to choose that suit their needs and financial condition.
Comparecards.com is a website that provide a tool to compare credit cads using online comparison tools. This site help you to make the best credit card decisions based on independent reviews, guides and latest credit cards news. You can visit this site. You can choose compare by category, compare by credit quality, compare by brand and then compare by issuer. You can directly choose one best of you with this online tool.
That should make it easier for you to decide. Just check out their card recommended page. Or check out their balance transfer credit card page. Make sure to choose the one what you need. low interest credit card, business credit cards, prepaid debit cards etc.
If you want to apply for low interest credit card but don’t really understand it, you can learn more about this cards from comparecards.com. You will be able to browse the available cards from this website and then apply it online directly from comparecards.com.
12 Agustus 2008
Alternatif Kartu kredit lewat Affiliate Friendfinder
Ringkasan ini tidak tersedia. Harap
klik di sini untuk melihat postingan.
My favorite seafood is Alaskan king crabs
 In Alaska, everything is big, fresh and pure. Alaskan king crab fishing is carried out during the winter months in the waters off the coast of Alaska and the Aleutian Islands. The commercial harvest is performed during a very short season, and the catch is shipped worldwide.
The Alaskan king crab are crustaceans chiefly found in cold seas. Their weight varies from 2 to 4kg (some species such as the blue king crab sometimes exceeds 8kg). Alaskan crab fishing is one of the United States’ most dangerous jobs albeit the good payout on a successful catch. Over 80% of these deaths are caused by drowning or hypothermia. Fishermen don't risk their life going out to fish for Alaskan King Crab . They put a lot of time and effort into catching these crabs.
Indigenous to the deep clear waters of Alaska and free from pollutants, the Alaska King Crab is truly King of the sea with tender juicy sweet meat. The Alaskan King Crab also has several natural predators that consider them a food source.
King crab is a great source of protein and low calories. King crab also known as stone crabs, king crabs are the most sought after crabs in Alaska
While most people think of Alaskan king crab as a luxury for dinner. One of my favorite seafood is Alaskan king crabs. Alaskan king crabs are the best because when you crack them open, you will find a giant piece of meat. The texture and flavor is more delicate and softer, and they have a unique sweet taste unlike the crab meat from the east coast. Alaskan king crab legs are sweet and tender with a mild flavor that is delicious by itself or accompanied by butter and sauces.
Do you know anything about Alaskan king crabs? You might want to visit AlaskanKingCrab.com, if you don’t know much about them. Try this yummy and healthy Alaskan king crab recipe. Click Alaskan king crabs to get more info
10 Agustus 2008
Herbal Nutrition Products
Maintained the health was very important. Here's how you can feel better today, and stay healthy for tomorrow: The food and physical activity choices you make every day affect your health. How you feel today, tomorrow, and in the future. Make smart choices from every food group, find your balance between food and physical activity and get the most nutrition out of your calories.
You may be eating plenty of food, but not eating the right foods that give your body the nutrients you need to be healthy. You may not be getting enough physical activity to stay fit and burn those extra calories. Find all your herbal nutrition needs from Total Body Herbal Nutrition
To everybody wants to slim down, increase your energy, reduce stress and rejuvenate your skin, you need to have a Herbal Nutrition and your Herbalife Independent Distributor can create a customized program, based on the Cellular Nutrition approach, to help you look and feel your best. You know Herbalife has helped millions of people worldwide.
There are lot of natural products available for an array of requirements, be it weight reduction , skin protection, energy generation, active and effective immune system. If you search for healthy products that can help you with all your problems like decrease weight, increase energy, reduce stress, rejuvenate skin, etc. You can get Herbal Nutrition Products, you can buy it at Herbalife Distributors on herbal-nutrition.net. They provide Herbal Nutritional Products and Support from independent Herbalife Distributors
The Herbal Nutrition Network provides retail websites to Independent Herbalife Distributors . Herbalife International covered USA, Canada, United Kingdom, Australia and New Zealand.
Interested in trying Herbalife products? Learn More about Herbal Life please visit herbal-nutrition.net now!
09 Agustus 2008
Gajian dari Blogsvertise
 Sehari ndak nongkrong di depan si COM, bC mencoba membuka email yang ada di gudang Yahoo.
Sepuluh deret email di kotak masuk telah menunggu klik dari bC. Pandangan bC tertarik pada email dari blogsvertise, yang menyatakan bahwa pihak juragan PTR tersebut telah mengirimkan "gaji' buat saya lewat Paypal.
Yang jadi kendala nih bagi bC.... gimana ya cara berurusan dengan Paypal?? Karena bC ndak punya CC sehingga status Account paypalku Unverified.
Menurut rekan-rekan, solusi terbaik gimana, ya??
Kalau lewat VCC.... bC sendiri ndak tahu makanan apa itu "VCC". Kira-kira kemana tuh ngurusnya???
Please help me.....
Malam Minggu bersama si TOle
Malam minggu ini, bC bingung saat ditanya mbok Dewor tentang cara menghibur kedua Tole.
Maklumlah, sejak si Tole besar operasi kami jarang sekali jalan-jalan meskipun sekedar untuk menghirup udara luar rumah.
bC sempat clinguk-an. Tiba-tiba si tole kecil bilang, " Yah aku mau main "balapan" seperti di tv itu, lho ".
Celetuk si tole kecil ini melahirkan ide bagiku. Tanpa pikir panjang aku ajak keluargaku untuk menghabiskan malam minggu di depan si Kom. Untunglah, jarak kantor dengan rumah bC tidak jauh.
Bagaimana dengan rekan-rekan blogger lainnya, kemana saja acara malam mingguan ini ????
Modern designer furniture online

Do you have Modern Furniture in your home ? Home decorating isn’t complete without placing a furniture. Choosing furniture for a room can be overwhelming because of the myriad options available these days.
The modern furniture is known for function, simplicity, originality, quality, longevity, architectural and technological elements. It’s also known for being practical and beautiful.
I want to share with you about one online store which is selling Contemporary Furniture. You can access them through their official website eroomservice.com.
You can see and manual choice the modern furniture do you like, you will see many modern furniture's with many choice for your rooms and you can found modern furniture and choice the best one with categories you need to display.
There are great furniture sets on their site, available for living room, dining room, bedroom and kids room. Many Italian furniture designs or Europe that can you find here.
Eroom Service have a great range of High quality designer furniture, and it's all designed to work together, so you can create living spaces that inspire you.
EroomService.com is a very useful website for those who are looking for Modern Furniture and love contemporary style information. So what are you waiting for, soon order now online, sign up and get the 5% savings on all modern furniture from eroomservice.
For more information you can leave your message by contacting their customer services any time.
08 Agustus 2008
Sentuhan Adobe P.CS3.EXT
 Percantik hasil review anda dengan sentuhan Adobe Photoshop CS3 Ext , dengan harapan akan mendapatkan nilai untuk hasil karya kita. Disini bC tidak memberikan tutorial bagaimana cara merayu dari tuan besar "PTR", namun bC hanya berusaha membagi pengetahuan bC dan mengajak belajar bersama untuk meningkatkan kemampuan kita dalam corat-coret di kanvas Adobe Photoshop.
Coba perhatikan gambar animasi dari hasil review "Lamps At the price of cheap and economical energy" yang merupakan task dari GBT Blogvertise. Gambar tersebut merupakan hasil corat-coret kerja sama dengan adobe photoshop Cs3 dan diabadikan di Photobucket kemudian dijadikan pajangan di BLOGGER.
Berikut cara membuatnya.
1. Buka kanvas baru pada adobe ( Ctrl + N ) dengan ukuran :
- Width = 200 px,
- Height = 200 px,
- Resolution 300 px/inch,
- Color mode = RGB 8 bit ,
- Background contents = Transparent.
2. Buka (Ctrl + O ) gambar yang akan anda modifikasi. Minimize kedua jendela adobe, untuk memindahkan gambar yang ada ke dalam kanvas kosong pada jendela adobe yang pertama.
3. Dengan "Move Tool" pindahkan gambar ke jendela kosong, sehingga akan timbul dua
 layer di WIndow Layer. Klik 2 X pada nama layer yang berisikan gambar dan ganti nama layer , misal "Ublik".
4. Dengan Ctrl + T, sesuaikan gambar dengan ukuran kanvas yang telah kita tentukan.

5. Pada Window ( Layer ) klik kanan "Layer Ublik" dan buat duplicate layer sebanyak 5 layer, sehingga jumlahnya ada 6 buah layer.
( sesuai jumlah lampu di gambar ).
Ganti nama layer dengan klik 2X pada nama masing-masing layer.
6. Klik gambar mata yang ada di sisi kiri tiap layer kecuali "Layer Ublik ". Dimulai dari "Layer Ublik" pada toolbar klik FILTER kemudian klik RENDER lalu klik LENS FLARE. Atur sesuai gambar
 Lens Flare
7. Sekarang munculkan gambar mata dengan mengklik kotak kosong disebelah kiri Layer Ublik 2, kemudian kerjakan langkah sesuai dengan no. 6, hanya saja pindahkan effek light (+) ke lampu berikutnya ( diurut ke kanan ). Ini berarti kita bekerja di Layer Ublik2.
8. Kerjakan langkah No. 7 dan No. 6 untuk Layer Ublik 3 hingga Layer Ublik 6.

9. Langkah selanjutnya adalah membuat animasi, pada Toolbar klik Window kemudian klik ANIMATION, sehingga akan muncul jendela animasi. Klik Layer Ublik kemudian klik gambar mata dari Layer Ublik2 hingga Layer Ublik6, sehingga yang nampak pada kanvas hanyalah gambar Layer Ublik, dan itu berati pada jendela animasi layer ublik merupakan Frame pertama.
 10. Pada Frame 1 di jendela animasi klik DELAY pada 1.0 second.
 11. Masih di jendela animasi, klik "Duplicated Selected Frames" untuk membuat frame kedua. Pada Layer Ublik2 munculkan gambar mata.
12. Kerjakan langkah no. 11 untuk Layer berikutnya hingga terakhir Layer Ublik6, kemudian pada jendela animasi klik "TWEENS ANIMATION FRAMES", atur sesuai gambar di bawah ini.

13. Untu melihat hasil dari pada animasi, coba klik tanda "PLAYS ANIMATION" pada jendela Animasi.

14. Setelah dirasa cukup sesuai dengan kemauan kita , klik FILE lalu "SAVE FOR WEB AND DEVICES" ( Alt + Shift + Ctrl + S ) dengan format GIF.
15. Upload gambar tersebut ke Photobucket dan gambar siap dipasang dipostingan review anda.
Selamat belajar.... semoga berhasil.
07 Agustus 2008
Lamps at the price of cheap and economical energy
 As important lamps in our life, considering at this time PLN continued to undertake his program with the blackout in a changing manner. In the PLN program about saved electricity energy, certainly we must consider electricity energy that was used by us everyday. Including the use of lamps for the illumination tonight.
Lights have played an vital role in many aspects of the human lives. Work tonight including read certainly needed lamps. Please imagined if our house tonight without light, certainly was pitch dark.
A house without lamps I think it’s like if you eat but there’s no salt taste. You can not see or view anything and it’s not funny if your house have no lamps. If you want to make your house more beautiful with some , why not visit Farreys.com.
Farreys.com offers thousands of lamps including table lamps, floor lamps, task lamps, reading lamps, piano lamps and torchieres in a wide range of styles and at the lowest prices from dozens of top manufacturers. Farreys.com's lamp product search tool quickly helps find the perfect lamps for your application.
Spoil your family with the light decoration that could generate the romantic situation. Generate the studying spirit of your children with the clear and frugal illumination energy from table lamps that was obtained by you from this site. Decorate your house garden with lights decorated that was frugal energy.
Be waiting for anything else, please visited Farrey's.com, and looked for forms of lamps along with his price in accordance with your appetite.
Bullet List Accordion Menu

bC mencoba untuk menambah referensi dalam blog "Horor" ini dengan membuat "Bullet List Accordion Menu" yang saya pelajari dari sini. Dalam mempelajari cara membuat "Bullet List Accordion Menu" ini, dua kali saya gagal. Karena tutorialnya selain beringgris ria, pengetahuan tentang kode-kode html atau javascript bC dangkal sekali.
Alhamdulillah setelah mencoba dan mencoba ......... kemudian memodifikasi isi dari tiap item kategori akhirnya berhasil juga.
Kalau anda mempelajari dari sumbernya, tentu anda akan dihadapkan kumpulan kode dari "Bullet List Accordion Menu" yang sekilas ribet. Terutama cara menaruh kode-kodenya ke dalam blog kita. Untuk itu pengalaman menarik ini akan saya bagi ke rekan blogger yang belum mempunyai bentuk "Bullet List Accordion Menu" di Sidebarnya. Dengan tampilan bullet list accordion menu pada sidebar, tentu akan lebih menambah nilai bagi blog kita.
Langkah-langkahnya adalah sebagi berikut :
1. Login ke Blogger, kemudian masuk pada "edit Html".
2. Cari kode <head>
3. Copy kode di bawah ini dan paste dibawah kode <head>.
<script type="text/javascript" src="http://nataludin.googlepages.com/jquery-1.2.2..txt"></script>
<script type="text/javascript" src="http://nataludin.googlepages.com/ddaccordion.txt.txt">
/***********************************************
* Accordion Content script- (c) Dynamic Drive DHTML code library (www.dynamicdrive.com)
* Visit http://www.dynamicDrive.com for hundreds of DHTML scripts
* This notice must stay intact for legal use
***********************************************/
</script>
<script type="text/javascript">
ddaccordion.init({
headerclass: "expandable", //Shared CSS class name of headers group that are expandable contentclass: "categoryitems", //Shared CSS class name of contents group revealtype: "click", //Reveal content when user clicks or onmouseover the header? Valid value: "click" or "mouseover collapseprev: true, //Collapse previous content (so only one open at any time)? true/false defaultexpanded: [0], //index of content(s) open by default [index1, index2, etc]. [] denotes no content onemustopen: false, //Specify whether at least one header should be open always (so never all headers closed) animatedefault: false, //Should contents open by default be animated into view?
persiststate: true, //persist state of opened contents within browser session? toggleclass: ["", "openheader"], //Two CSS classes to be applied to the header when it's collapsed and expanded, respectively ["class1", "class2"]
togglehtml: ["prefix", "", ""], //Additional HTML added to the header when it's collapsed and expanded, respectively ["position", "html1", "html2"] (see docs) animatespeed: "normal", //speed of animation: "fast", "normal", or "slow" oninit:function(headers, expandedindices){ //custom code to run when headers have initalized
//do nothing }, onopenclose:function(header, index, state, isuseractivated){ //custom code to run whenever a header is opened or closed
//do nothing }})
</script>
<style type="text/css">
.arrowlistmenu{width: 180px; /*width of accordion menu*/}
.arrowlistmenu .menuheader{ /*CSS class for menu headers in general (expanding or not!)
*/font: bold 14px Arial; color: white; background: black url(http://nataludin.googlepages.com/titlebar.png) repeat-x center left; margin-bottom: 10px; /*bottom spacing between header and rest of content*/text-transform: uppercase; padding: 4px 0 4px 10px; /*header text is indented 10px*/ cursor: hand; cursor: pointer;}
.arrowlistmenu .openheader{ /*CSS class to apply to expandable header when it's expanded*/ background-image: url(http://nataludin.googlepages.com/titlebar-active.png);}
.arrowlistmenu ul{ /*CSS for UL of each sub menu*/ list-style-type: none; margin: 0; padding: 0; margin-bottom: 8px; /*bottom spacing between each UL and rest of content*/}
.arrowlistmenu ul li{padding-bottom: 2px; /*bottom spacing between menu items*/}
.arrowlistmenu ul li a{color: #A70303; background: url(http://nataludin.googlepages.com/arrowbullet.png) no-repeat center left; /*custom bullet list image
*/ display: block; padding: 2px 0; padding-left: 19px; /*link text is indented 19px*/ text-decoration: none; font-weight: bold; border-bottom: 1px solid #dadada; font-size: 90%;}
.arrowlistmenu ul li a:visited{color: #A70303;}
.arrowlistmenu ul li a:hover{ /*hover state CSS*/ color: #A70303; background-color: #F3F3F3;} </style>
4. Kemudian simpan template anda.
5. Langkah selanjutnya masuk ke "Tata Letak" kemudian ke "Elemen Halaman" dan tambahkan elemen halaman "HTML". Pada proses ini, sesuai dari sumber aslinya sebenarnya berisikan pautan link, namun saya mencoba untuk mengisikan "Shoutbox, Blogroll dan beberapa tautan link" sebagai contoh untuk memudahkan rekan-rekan.
6. Copy kode dibawah ini dan tambahkan ke elemen halaman HTML.
<div class="arrowlistmenu">
<h3 class="menuheader expandable">Shoutbox</h3>
<ul class="categoryitems">
<div style="height: auto;" class="bd">
<div class="fixed">
<p>
Ini tempat shoutbox anda
</p>
</div>
</div>
</ul>
<h3 class="menuheader expandable">Link Sobat</h3>
<ul class="categoryitems">
<div style="overflow: auto;background-color:#C7DFB5; margin: 0px auto; padding: 5px;font-size: 12px; height: 200px;width: 94%;text-align: left;">
<li><a href="alamat link teman" target="_blank">Nama Link</a></li>
<li><a href="alamat link teman" target="_blank">Nama Link</a></li>
<li><a href="alamat link teman" target="_blank">Nama Link</a></li>
<li><a href="alamat link teman" target="_blank">Nama Link</a></li>
</div>
</ul>
<h3 class="menuheader expandable">Artkel Menarik</h3>
<ul class="categoryitems">
<li><a href="Alamat Link" target="_blank">Nama artikel</a></li>
<li><a href="Alamat Link" target="_blank">Nama artikel</a></li>
</ul>
<h3 style="cursor: default" class="menuheader">Coretan Asal</h3>
<div>
Silahkan anda variasi sendiri isinya, jangan mudah menyerah
</div>
</div>
7. Simpan dan coba lihat hasilnya.
Untuk Shoutbox, Link sobat dan isinya silahkan anda ganti sesuai selera anda
Hasil daripada tutorial ini bisa anda lihat
Selamat mencoba.
06 Agustus 2008
Coretan Coreldraw X3
Logo di atas dibuat dengan Coreldraw X3
Untuk sekedar iseng melatih tangan yang selalu gatel bila ndak ngoret-ngoret di kanvas coreldraw X3.
Health and Beauty products
 Anyone, both the man and the certain woman will always maintain their appearance to stay fresh and delicious it was considered. Maintained the health was important so that the appearance someone became first-rate. Maintained the health and beauty was certainly not free from our efforts to look for the best solution.
Besides processing the body certainly we needed the supplement or products that were connected with the health and beauty. To get the health and beauty product, certainly we at random did not buy him. No use not if this product his price was expensive but we did not know his instruction
Assistant automatically fills out forms at online merchants to make for a somewhat seamless shopping experience. It also displays Shop Wiki’s top product search results below your product search results on a Google "Product Search".
You can find deals on any products you needs from Health and beauty products. There are lot of new Health and beauty products and accessories that are introduced in the market every week by different companies which involve product improvements, packaging changes, new packs, new ingredients, new improved formulations to give you better results etc.
Just search your needs on the search box, this shopping search engine will give you all products match with your needs. You can choose narrow result by price, brand, favorite stores or even colors. You can create comparison and see the best result for you.
Several shopping profits through this site among them were the existence of the escort in using each element of the Health and Beauty like cosmetics guide, skin care guide, hair care guide, men’s grooming guide, bath & body guide and fragrances guide. Through this step by step guidance you will be able to get complete knowledge on Health & Beauty which will help you to go for the right kind of products for you.
Several links that had the Web Site with information on the Health and beauty product relationship was included also to guide you in using the health product and beauty. You can see a product reviews that you can use for create decision to buy the product or not. See the lower price if you want to get the best price.
As a customer, you end up getting a wider choice, which means better value for your money.
03 Agustus 2008
AJAX Labels with Label Cloud
Sebenarnya tidak asing lagi bagi kalangan blogger, karena tutorialnya banyak kita jumpai. Salah satunya ada di blog atau kunjungi sumbernya dan .
Namun disini saya ingin menerjemahkan tutorial tersebut ke dalam versi "bahasa saya" dengan harapan dapat dengan mudah untuk dimengerti.
Pertama-tama kita instal Label Cloud.
1. Cari kode ]]></b:skin>, kemudian copi dan paste kode dibawah ini sebelum kode ]]></b:skin>.
/* Label Cloud Styles
----------------------------------------------- */
#labelCloud {text-align:center;font-family:arial,sans-serif;}
#labelCloud .label-cloud li{display:inline;background-image:none !important;padding:0 5px;margin:0;vertical-align:baseline !important;border:0 !important;}
#labelCloud ul{list-style-type:none;margin:0 auto;padding:0;}
#labelCloud a img{border:0;display:inline;margin:0 0 0 3px;padding:0}
#labelCloud a{text-decoration:none}
#labelCloud a:hover{text-decoration:underline}
#labelCloud li a{}
#labelCloud .label-cloud {}
#labelCloud .label-count {padding-left:0.2em;font-size:9px;color:#000}
#labelCloud .label-cloud li:before{content:"" !important}
2. Copy dan paste kode dibawah ini diatas kode </head>.
<script type='text/javascript'>
// Label Cloud User Variables
var cloudMin = 1;
var maxFontSize = 20;
var maxColor = [0,0,255];
var minFontSize = 10;
var minColor = [0,0,0];
var lcShowCount = false;
</script>
Simpan template anda.
3. Sekarang kita akan memasang widget, cari kode dibawah ini : (pada bab ini berdasarkan pengalaman, jangan centang kotak Expand Template Widget, karena apabila kita simpan template maka akan ada pesan error dari blogger ).
<b:widget id='Label1' locked='false' title='Labels' type='Label'/>
Ganti kode diatas dengan kode di bawah ini :
<b:widget id='Label1' locked='false' title='Label Cloud' type='Label'>
<b:includable id='main'>
<b:if cond='data:title'>
<h2><data:title/></h2>
</b:if>
<div class='widget-content'>
<div id='labelCloud'/>
<script type='text/javascript'>
// Don't change anything past this point -----------------
// Cloud function s() ripped from del.icio.us
function s(a,b,i,x){
if(a>b){
var m=(a-b)/Math.log(x),v=a-Math.floor(Math.log(i)*m)
}
else{
var m=(b-a)/Math.log(x),v=Math.floor(Math.log(i)*m+a)
}
return v
}
var c=[];
var labelCount = new Array();
var ts = new Object;
<b:loop values='data:labels' var='label'>
var theName = "<data:label.name/>";
ts[theName] = <data:label.count/>;
</b:loop>
for (t in ts){
if (!labelCount[ts[t]]){
labelCount[ts[t]] = new Array(ts[t])
}
}
var ta=cloudMin-1;
tz = labelCount.length - cloudMin;
lc2 = document.getElementById('labelCloud');
ul = document.createElement('ul');
ul.className = 'label-cloud';
for(var t in ts){
if(ts[t] < cloudMin){
continue;
}
for (var i=0;3 > i;i++) {
c[i]=s(minColor[i],maxColor[i],ts[t]-ta,tz)
}
var fs = s(minFontSize,maxFontSize,ts[t]-ta,tz);
li = document.createElement('li');
li.style.fontSize = fs+'px';
li.style.lineHeight = '1';
a = document.createElement('a');
a.title = ts[t]+' Posts in '+t;
a.style.color = 'rgb('+c[0]+','+c[1]+','+c[2]+')';
a.href = '/search/label/'+encodeURIComponent(t);
if (lcShowCount){
span = document.createElement('span');
span.innerHTML = '('+ts[t]+') ';
span.className = 'label-count';
a.appendChild(document.createTextNode(t));
li.appendChild(a);
li.appendChild(span);
}
else {
a.appendChild(document.createTextNode(t));
li.appendChild(a);
}
ul.appendChild(li);
abnk = document.createTextNode(' ');
ul.appendChild(abnk);
}
lc2.appendChild(ul);
</script>
<noscript>
<ul>
<b:loop values='data:labels' var='label'>
<li>
<b:if cond='data:blog.url == data:label.url'>
<data:label.name/>
<b:else/>
<a expr:href='data:label.url'><data:label.name/></a>
</b:if>
(<data:label.count/>)
</li>
</b:loop>
</ul>
</noscript>
<b:include name='quickedit'/>
</div>
</b:includable>
</b:widget>
4. Langkah selanjutnya kita akan menginstall Ajax Labels, klik Page Layout kemudian ke Edit HTML. Centang kotak "Expand Widget Templates" kemudian cari kode </head> tag di dalam template. Masukkan kode berikut tepat di atas kode </head>.
<style type='text/css'>
#indicator {position:fixed;z-index:1000;padding:15px 0;top:40%;background-color:#FFFFFF;border:1px solid #AAAAAA;width:176px;left:50%;margin-left:-88px;text-align:center;}
#search-result {border:1px solid #AAAAAA;padding:10px;padding-bottom:30px;font-size:85%;}
.search-result-meta {background:#EFEFEF;padding:2px;}
.search-result-meta img {border-width:0;vertical-align:text-bottom;}
.search-title {font-size:1em;padding-bottom:3px;font-weight:bold;text-align:left;text-decoration:underline;}
.search-cat {display:block;padding:3px;font-size:1em;margin-top:5px;margin-bottom:5px;border-bottom:1px solid #C0C0C0;font-weight:bold;}
.search-close {color:silver;float:right;border:1px solid #F5F5F5;margin-top:10px;cursor:pointer;}
.search-result-nav {font-size:1.4em;font-weight:bold;padding:5px 0pt;text-align:center;}
</style>
<script type='text/javascript' src='http://bloggerhacked.googlepages.com/prototype.js' />
<script type='text/javascript'>
//<![CDATA[
// User customisable parameters
// ----------------------------
// maxresults - Number of results to show per page
// navFlag - Set Navigation ON or OFF. Give 1 for ON and 0 for OFF.
// feedLabel - Text to show for the label feed link.
// catLabel - Label for categories.
// closeLabel - Label for Close button. You can use hypertext also.
var maxresults = 5;
var navFlag = 1; //ON by default
var feedLabel = "Subscribe to";
var catLabel = "Sorted into:";
var closeLabel = "Click to close";
//]]>
</script>
<script type='text/javascript' src='http://bloggerhacked.googlepages.com/ajaxlabels.js' />
5. Sekarang cari kode
<b:loop values='data:post.labels' var='label'>
<a expr:href='data:label.url' rel='tag'><data:label.name/></a>
Ganti kode di atas dengan kode di bawah ini :
<b:loop values='data:post.labels' var='label'>
<a href='#sres' expr:onclick='"javascript:getCat(\"" + data:label.name + "\",null)"' rel='tag'><data:label.name/></a>
Simpan template anda.
6. Sekarang buka Tata letak klik elemen halaman. Silahkan anda tentukan tempat penambahan elemen halaman yang nantinya berfungsi untuk memunculkan tampilan ringkasan posting saat label cloud di klik baik oleh anda maupun pengunjung blog anda. Masukkan kode di bawah ini dengan menambahkan elemen halaman "HTML/JavaScript "
(Lebih praktis di taruh di atas postingan. Untuk tampil di atas postingan, sebelumnya pada edit HTML di template, cari kode
<b:section class='main' id='main' showaddelement='no'> ganti "no" dengan "yes")
<div id="indicator" style="display:none"><img alt="Indicator" src="http://bloggerhacked.googlepages.com/indicator.gif"/> Loading...</div><div id="search-result" style="display:none"><a name="sres"></a><div class="search-close" onclick="javascript:Element.hide('search-result')"><script type="text/javascript">document.write(closeLabel);</script></div><div id="show-result"></div><div class="search-close" onclick="javascript:Element.hide('search-result')"><script type="text/javascript">document.write(closeLabel);</script></div></div>
Simpan dan coba cek dengan lihat blog anda.
7. Jika pada proses ini tidak berjalan silahkan anda kembali ke edit html pada template anda, cari kode di bawah ini :
'"javascript:getCat(\"" + data:label.name + "\")"'
ganti dengan kode di bawah ini :
'"javascript:getCat(\"" + data:label.name + "\",null)"'
Selamat mencoba, ingat jangan putus asa untuk mencoba. Sebagai saran terapkan pada awal pembuatan blog baru anda. Kalaupun anda ingin menerapkan ke blog kesayangan anda, back up dulu blog anda.
(Bagi anda yang kurang puas dengan terjemahan ini, silahkan kunjungan link yang saya pasang di awal posting ini)
Langganan:
Postingan (Atom)
-
 Sharing kali ini akan membahas bagaimana membuat Animasi Header pada Prosedur Modifikasi Minima yang diberi judul "Edel2XMinima". ...
 -
 Mengamankan data yang kita miliki dari Copas user lain itu sangat penting, terlebih jika data tersebut bersifat rahasia. Fasilitas yang ada...
 -
Saat sarapan, si "TOLE" kecil tanya ama bapak-e. Si Tole : " Yah... sekarang Ibu goreng Tahu & Tempe sedikit,ya ? "...
